 Save
Save There's something about late July that makes corn taste like the season itself—golden, sweet, impossibly fresh. I grew up watching my dad pull ears straight from the farmer's market on Saturday mornings, already planning what we'd do with them by lunch. The simplicity of boiled corn with butter and salt seemed almost too easy to get excited about, until the first time I actually paid attention to the smell of it cooking, that gentle sweetness rising with the steam. Now it's my go-to when I need something that feels both effortless and celebratory.
I remember a Fourth of July picnic where everyone brought complicated sides—coleslaw, potato salad, grilled vegetables—and somehow the corn I'd boiled that morning in my tiny apartment kitchen became the thing people actually wanted. One of my friends ate three ears in a row without talking, which felt like the highest compliment I'd ever received from a food perspective.
Ingredients
- Corn: Four ears of fresh corn, husked and ready to cook; the fresher it is, the sweeter it'll taste, and there's honestly a noticeable difference between corn from the farmer's market and corn that's been sitting in a grocery store for a week.
- Unsalted Butter: Two tablespoons softened, because salted butter will compete with the salt you add later and throw off the whole balance.
- Sea Salt: One teaspoon or however much feels right to you; the coarse crystals stick better than fine salt and give you little bursts of flavor.
Tired of Takeout? 🥡
Get 10 meals you can make faster than delivery arrives. Seriously.
One email. No spam. Unsubscribe anytime.
Instructions
- Get Your Water Ready:
- Fill a large pot most of the way with water and turn the heat up high until it's at a rolling boil. This is the important part—you want the water actively boiling before the corn goes in, not just hot.
- Add the Corn:
- Drop in all four ears at once and let the water come back to a boil. Set your timer for five to seven minutes depending on the size of your corn; you're looking for kernels that are bright yellow and tender when you press one with your nail.
- Fish Them Out:
- Use tongs to grab each ear carefully and transfer to a plate or cutting board. If they're wet, give them a quick pat with paper towels so the butter adheres better.
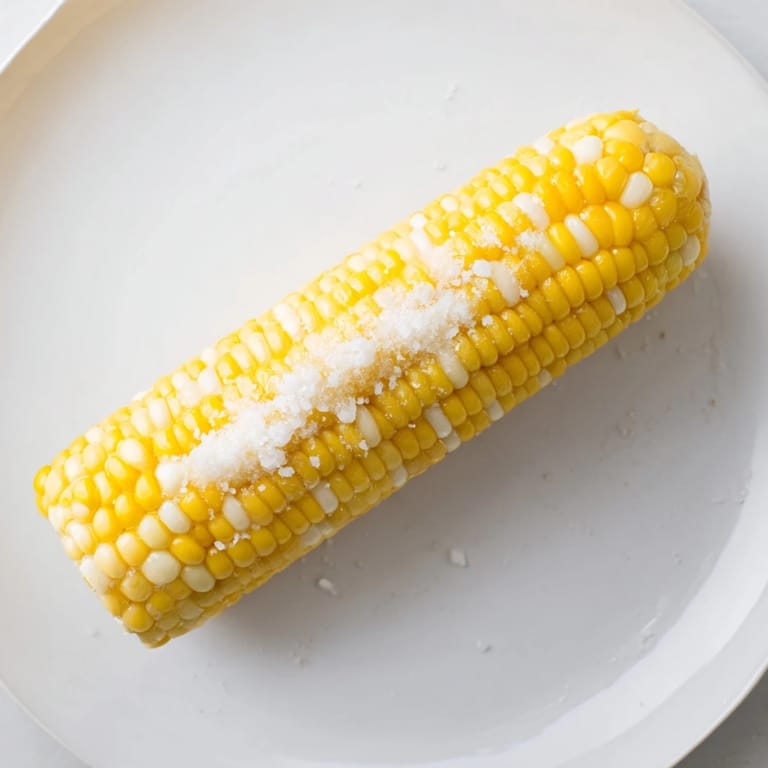
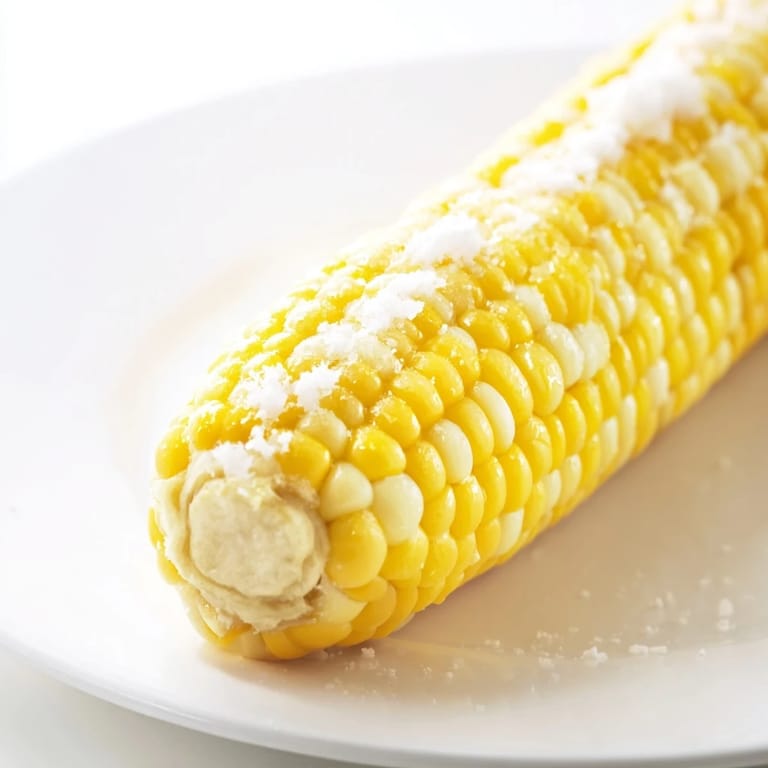
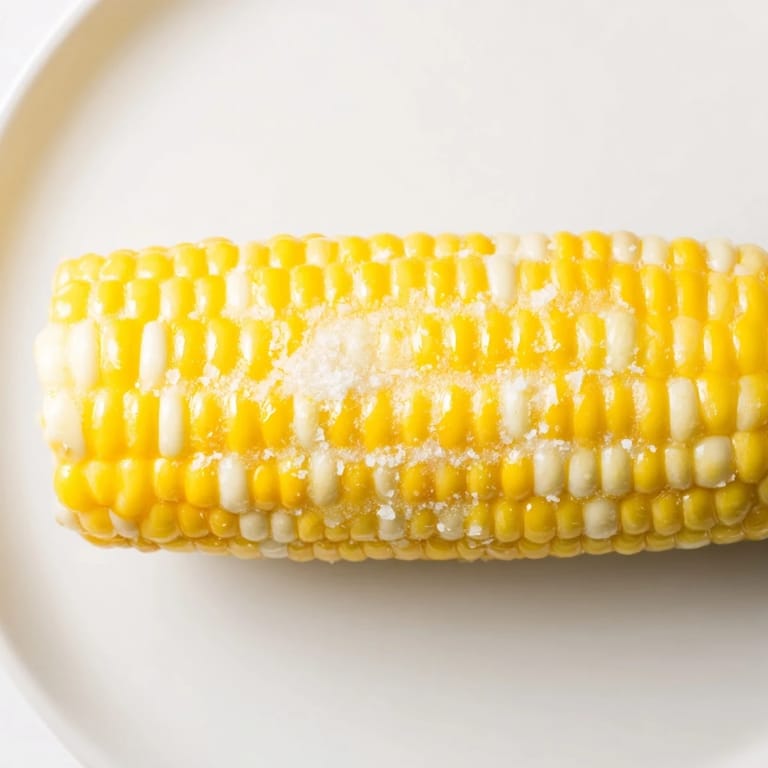
- Butter While Hot:
- This is non-negotiable—spread the softened butter over each ear right away while the corn is still steaming, because hot corn actually helps the butter melt evenly rather than just sitting on top. Sprinkle salt to your taste, turning the ear as you go so it coats all sides.
- Serve Immediately:
- Corn waits for no one, so get it on the table while it's still warm enough for the butter to be glossy.
 Save
Save My mom used to say that corn on the cob was the only vegetable that didn't feel like a vegetable, and I think that's why it became such a summer staple in our house. It was the thing kids would actually ask for, the side dish that somehow became the main event.
Grilling as an Alternative
If you want char and smoke instead of pure sweetness, skip the boiling and go straight to the grill. Preheat it to medium-high heat, brush each ear lightly with oil, and turn them every few minutes for about ten to twelve minutes total until you get some light charring on the kernels. There's a completely different flavor that develops on a grill—less bright and sweet, more toasty and complex. I love doing this when I'm already grilling other things because the corn picks up subtle flavors from whatever else is on there.
Flavor Variations to Try
Once you've mastered the basic version, the fun part is experimenting with what goes on top. A light dusting of smoked paprika adds depth without overpowering the corn, while grated Parmesan brings a salty, umami richness that somehow makes sense here. My favorite discovery was lime juice and a tiny pinch of chili powder borrowed from my neighbor's kitchen one summer—it creates this bright, slightly spicy contrast that keeps you reaching for another ear.
- Smoked paprika, Parmesan, or fresh herbs transform it into something restaurant-worthy in literally thirty seconds.
- Lime and chili powder is a game-changer if you want something with actual personality beyond just butter and salt.
- Keep a piece of foil nearby after cooking so you can wrap the ears and maintain heat if people are still sitting at the table talking.
 Save
Save Corn on the cob reminds me that the best meals don't need to be complicated—sometimes the most satisfying thing is letting good ingredients be exactly what they are. This is summer on a plate, and it deserves a spot on your table.
Recipe FAQs
- → How do I cook corn on the cob to keep it tender?
Boil fresh husked corn for 5–7 minutes until bright yellow and tender. Avoid overcooking to maintain juiciness.
- → Can I grill corn instead of boiling it?
Yes, grilling over medium-high heat for 10–12 minutes with occasional turning gives a slightly charred, smoky flavor.
- → What toppings enhance the flavor of corn on the cob?
Butter and sea salt are classic, while smoked paprika or grated cheese add an extra layer of taste.
- → How can I keep corn warm after cooking?
Wrapping cooked corn in foil helps retain heat until serving.
- → Is this dish suitable for gluten-free diets?
Yes, the ingredients are naturally gluten-free and vegetarian friendly.