 Save
Save There's something almost magical about the smell of waffles hitting your kitchen on a lazy weekend morning. I discovered the secret to truly great waffles not from a cookbook, but from my neighbor who knocked on my door one Saturday with a waffle iron under her arm and a knowing smile. She taught me that the real trick isn't fancy ingredients, but respecting the batter and knowing when to stop stirring. Now, every time I make them, I think of her standing in my kitchen, watching the first batch turn golden.
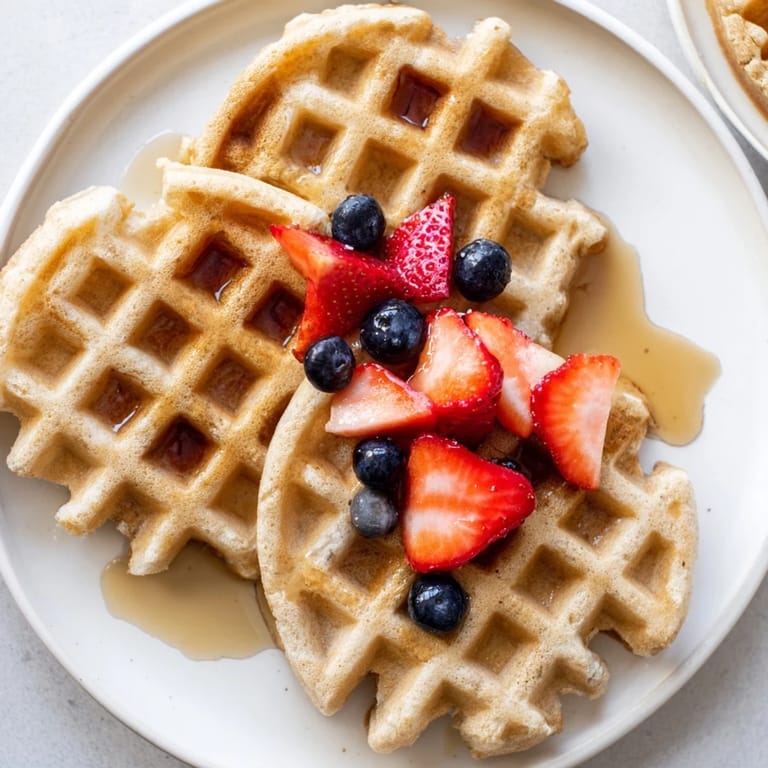
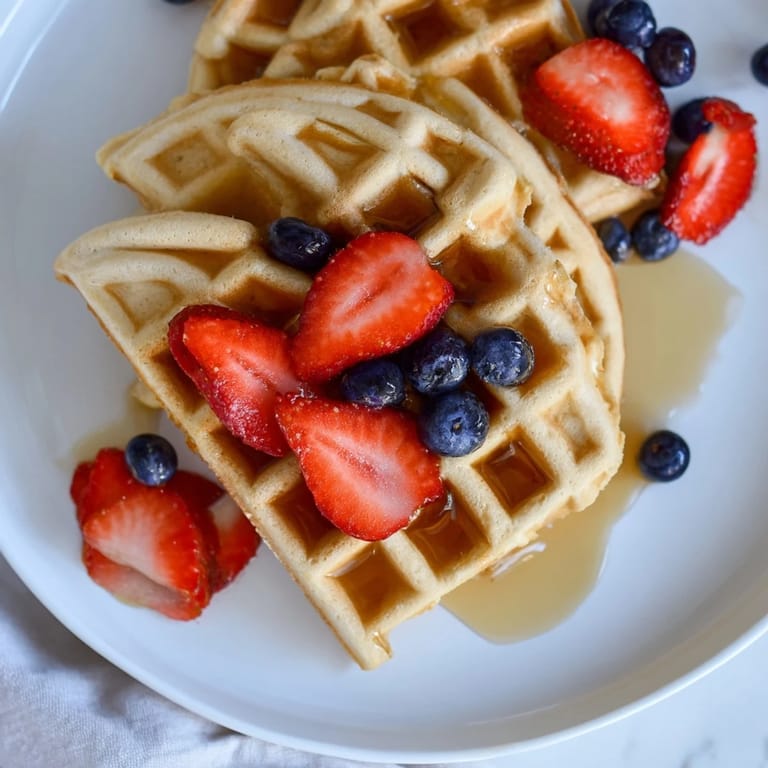
I remember making these for my sister's surprise visit during college—she arrived hungry and skeptical, but one bite and she was texting me the recipe before she left. There's something about waffles that turns an ordinary morning into a moment people actually remember, especially when you serve them with fresh berries and real maple syrup.
Ingredients
- All-purpose flour (2 cups): This is your structure, so don't sift it unless you're feeling fancy; a gentle stir in the bag before measuring does the trick.
- Granulated sugar (2 tbsp): Just enough to give the waffles a subtle sweetness without making them dessert.
- Baking powder (1 tbsp): This is what gives you that lift and those little air pockets you're after.
- Salt (½ tsp): A pinch that makes the vanilla sing and balances everything out.
- Large eggs (2): They bind everything and add richness; room temperature works better than cold straight from the fridge.
- Whole milk (1¾ cups): The fat content matters here—it keeps things tender and gives you that creamy interior.
- Unsalted butter, melted and cooled (½ cup): Cooled is the word; if you pour hot butter into wet ingredients, you risk cooking the eggs.
- Pure vanilla extract (1 tsp): The real stuff, always; imitation just tastes hollow once you know the difference.
Tired of Takeout? 🥡
Get 10 meals you can make faster than delivery arrives. Seriously.
One email. No spam. Unsubscribe anytime.
Instructions
- Heat your waffle iron:
- Get it preheating while you gather your ingredients, and let it reach that sweet spot where a drop of water sizzles immediately. Every waffle iron has its own personality, so the first batch is always your learning moment.
- Mix the dry team:
- Whisk your flour, sugar, baking powder, and salt together in a large bowl. This step might seem simple, but it distributes the leavening evenly so you don't end up with dense spots.
- Combine the wet ingredients:
- In a separate bowl, whisk eggs, milk, cooled melted butter, and vanilla until they're fully combined and smooth. Keeping this separate prevents overmixing later, which is the enemy of tender waffles.
- Bring it together gently:
- Pour the wet mixture into the dry ingredients and stir just until combined—this is where patience pays off. Those little lumps? They're your friends; they mean the gluten isn't overworked, which means tender waffles instead of tough ones.
- Prepare your iron:
- A light butter or non-stick spray on the waffle iron ensures easy removal and that crispy exterior you're after. Do this even if your iron claims to be non-stick.
- Pour and cook:
- Fill the iron just enough to cover the grid; too much batter spills over the sides and makes a mess. Close the lid and listen for the sound of it sizzling down—usually 3 to 5 minutes depending on your iron, until it stops steaming and smells irresistibly golden.
- Finish strong:
- Transfer each waffle to a warm plate or wire rack, and repeat until your batter is gone. If you stack them while hot, the steam makes them soft; the rack keeps them crispy.
 Save
Save The first time someone ate these waffles and closed their eyes before saying anything, I knew I'd nailed it. That moment taught me that good cooking isn't about impressing people with complexity; it's about doing the simple things right.
The Secret to Crispy Exteriors
The waffle iron temperature is everything, and most people let theirs cool down between batches without realizing it. I learned to let mine preheat for a full minute before the first waffle goes in, and to give it 10 seconds between batches to come back up to heat. Your waffle iron will tell you when it's ready—listen for that first sizzle, and you'll know you're in the zone.
Flavor Riffs That Changed My Game
Once I started playing with additions, waffles became my canvas. A pinch of cinnamon makes them taste like a cozy morning; nutmeg whispers in the background and feels a little more sophisticated. Some people swear by substituting buttermilk for a tangier bite, and honestly, it's worth trying at least once to find your favorite version.
Making Ahead and Storing
These waffles freeze beautifully, which means you can make a big batch on Sunday and have breakfast ready all week. Cool them completely on a wire rack before freezing so they don't stick together, and they'll keep for up to two months. A quick run through the toaster brings them back to life—crispy outside, warm inside, just like fresh.
- Always cool waffles on a rack before freezing to prevent them from sticking together into one big block.
- Pop frozen waffles straight into the toaster; no thawing needed, and you'll get that crispy texture back.
- Store cooled waffles in an airtight container or freezer bag to keep them fresh and prevent freezer burn.
 Save
Save There's a reason waffles have been breakfast comfort food for generations. They're forgiving, delicious, and they always feel like someone cared enough to make them.
Recipe FAQs
- → How do I achieve crispy waffles?
Preheat the waffle iron well and avoid stacking waffles immediately after cooking; resting on a wire rack helps maintain crispness.
- → Can I add flavors to the batter?
Yes, adding a pinch of cinnamon or nutmeg enhances the flavor without overpowering the base taste.
- → What is the best way to store leftover waffles?
Let waffles cool completely, then freeze in an airtight container for up to two months. Reheat in a toaster for best results.
- → How do I prevent waffles from sticking to the iron?
Lightly grease the waffle iron with butter or non-stick spray before pouring the batter to ensure easy removal.
- → Can I substitute any ingredients for dietary preferences?
Using buttermilk instead of regular milk delivers a tangier flavor, and alternatives can be tried with care to maintain batter consistency.